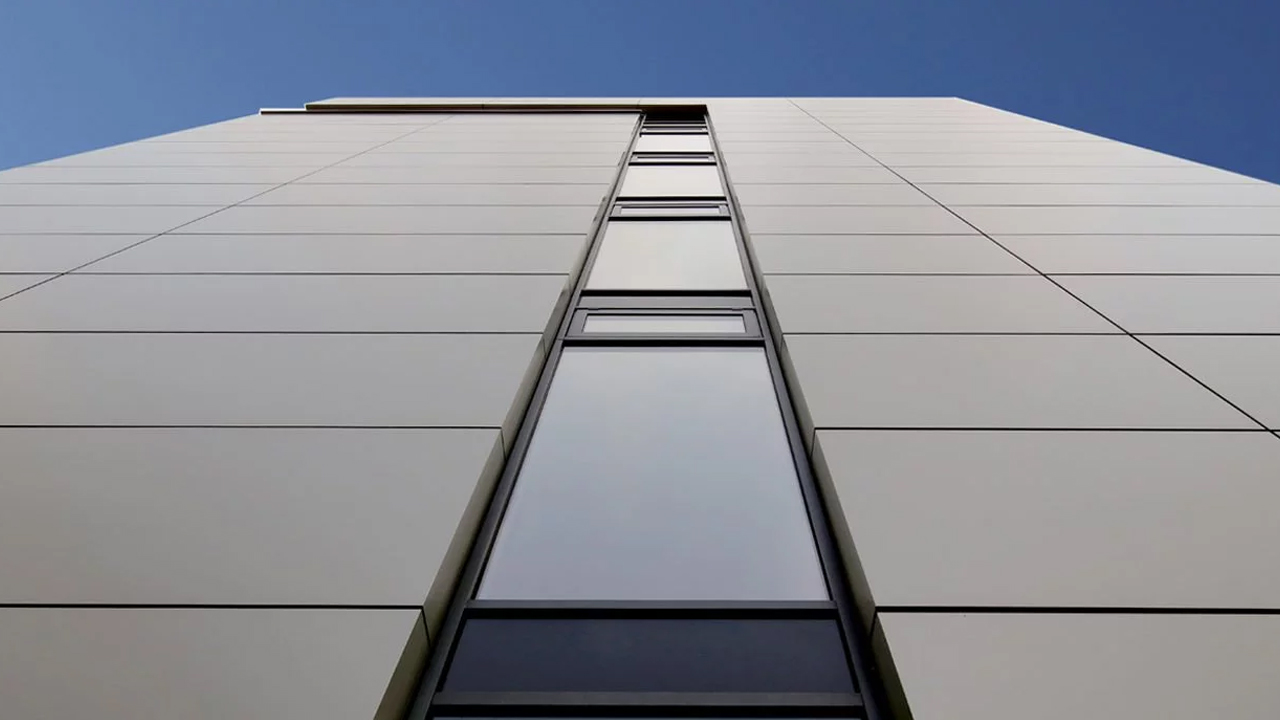
Aluminium cladding is a popular choice for modern building exteriors, offering a sleek and contemporary look while providing durability and weather protection. Installing aluminum cladding requires careful planning and execution to ensure a flawless finish. This comprehensive guide will walk you through the entire installation process, from surface preparation to fixing methods and best practices. Whether you're a professional contractor or a DIY enthusiast, this step-by-step guide will provide you with the necessary knowledge and tips to tackle an aluminium cladding project with confidence. By following the instructions and following the recommended techniques, you can achieve a stunning and long-lasting aluminium cladding installation that enhances the aesthetic appeal and value of your property.
Step By Step Guide For Installing Aluminium Cladding Panels
Preparation:
- • Clean wall surface: Thoroughly inspect the wall surface and remove any loose materials, dirt, protrusions, or debris that may interfere with the installation process, ensuring a clean and smooth surface for proper panel adhesion.
- • Plan panel layout: Carefully determine the desired layout and pattern of the panels before starting the installation, taking into account the panel sizes, desired aesthetics, and any specific design requirements or architectural features.
- • Gather tools/materials: Ensure you have all the necessary tools, panels, fasteners, sealants, and any other required accessories readily available and organized before starting the installation process to avoid delays.
Installation:
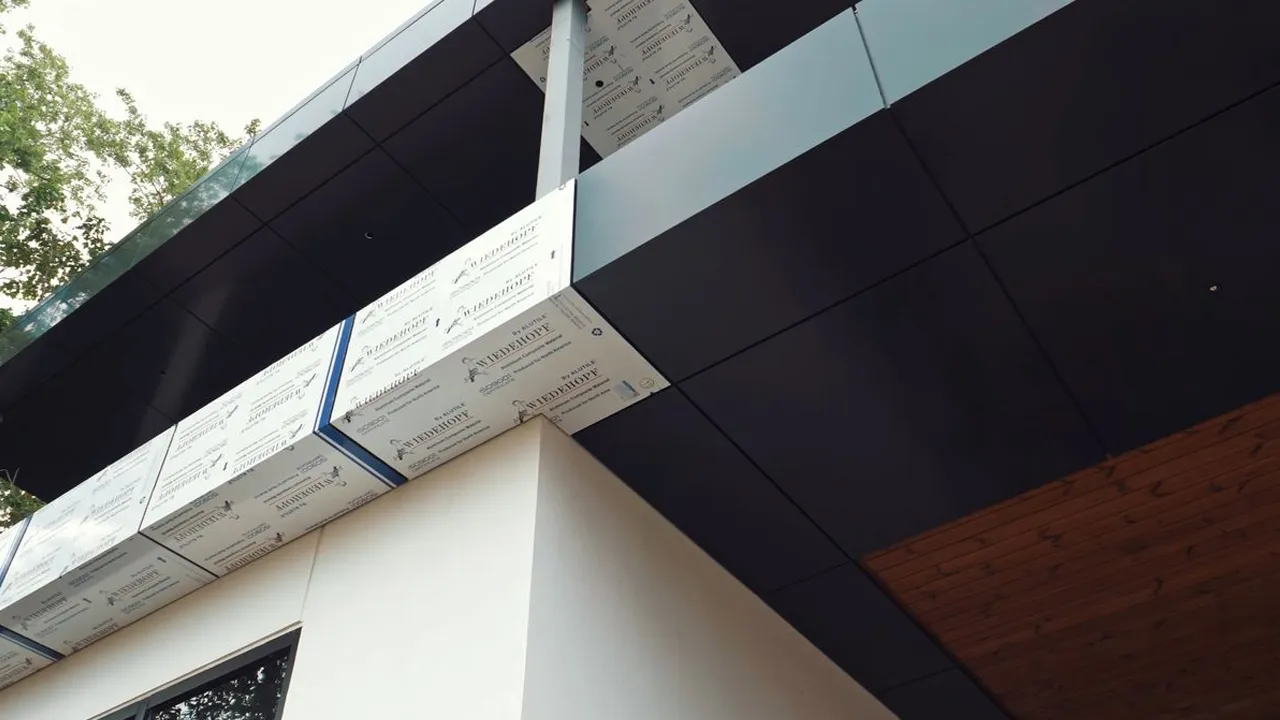
- • Install starter track: Begin the installation by securely fastening a starter track or base channel along the bottom of the wall, ensuring it is level and properly aligned to provide a stable foundation.
- • Apply sealant on track: Apply a continuous bead of sealant or gasket material along the back of the starter track to create a tight seal and prevent water infiltration between the track and wall surface.
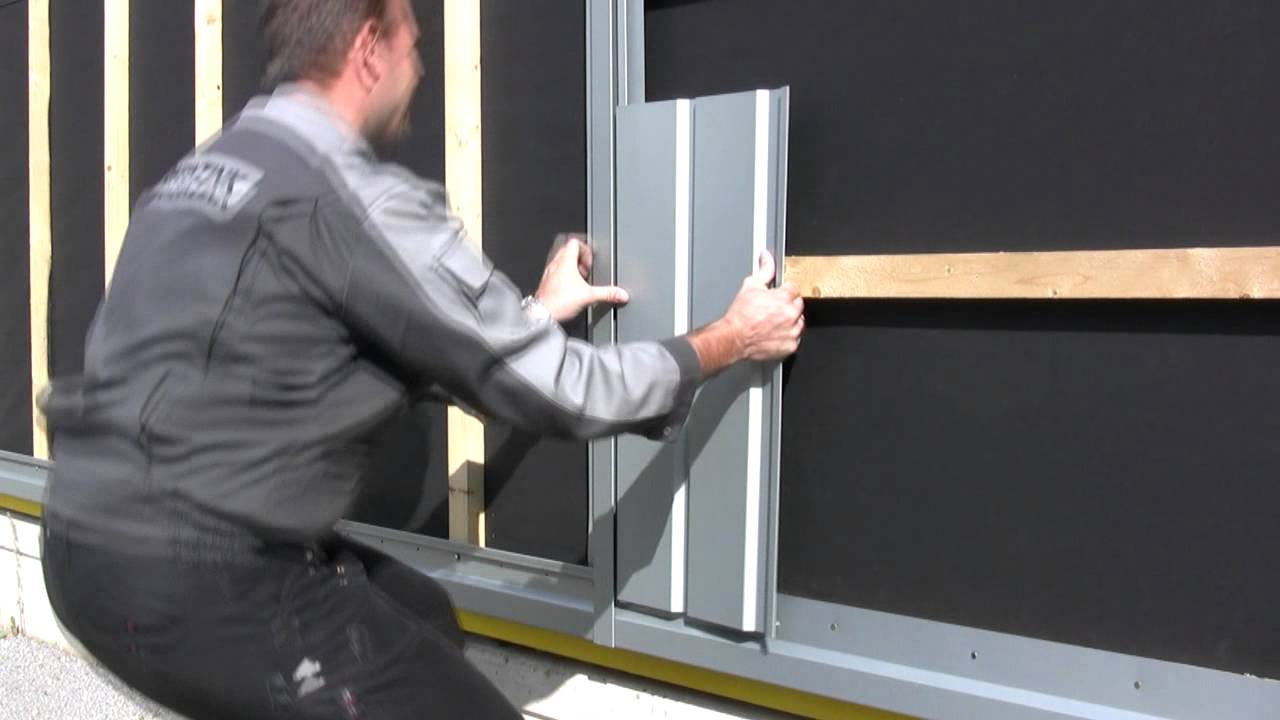
- • Place first panel: Carefully position the first panel into the starter track, making sure it is vertically plumb (straight up and down) and horizontally level for a precise and visually appealing installation.
- • Fasten panel to wall: Secure the panel to the wall substrate using the recommended fasteners, following the manufacturer's instructions for proper spacing and depth to ensure a strong and durable installation.
- • Seal between panels: Apply sealant or gasket material between the panels as required to create a weathertight seal and prevent water infiltration, ensuring the panels are properly sealed and protected from the elements.
- • Install next panel: Install the next panel, aligning it with the previous panel and ensuring a tight fit between the panels for a seamless and visually appealing appearance.
- • Repeat for row: Continue installing aluminium cladding panels in the same row, following the same steps until you reach the end of the row, ensuring consistency and proper alignment throughout the installation.
- • Install termination bar: At the end of each row, install a termination bar or channel to securely hold the last panel in place and provide a clean, finished look.
- • Start new row: Begin the next row by installing a starter track or channel, ensuring that the joints are offset from the row below for proper structural integrity and visual appeal.
- • Repeat for full wall: Repeat the installation process for each subsequent row until the entire wall is completely covered with the aluminum cladding panels, following the same steps for consistency and quality.
Finishing:
- • Install trim pieces: Install any required trim pieces, such as corner trims or sill trims, following the manufacturer's instructions precisely for proper installation and a polished, professional appearance.
- • Inspect and seal gaps: Carefully inspect the entire installation for any gaps or irregularities and apply sealant as needed to ensure a weathertight and visually appealing finish, addressing any potential issues or imperfections.
- • Clean panels: After the installation is complete, clean the aluminium cladding panels according to the manufacturer's recommendations to maintain their appearance, longevity, and ensure a pristine, like-new look.
Troubleshooting and Common Issues While Installing Aluminum Cladding
Thermal Expansion/Contraction
- • Issue: Aluminum expands and contracts with temperature changes, which can cause buckling, warping or gaps between panels if not properly accounted for.
- • Solution: Follow manufacturer guidelines for proper expansion/contraction gaps and use expanding gaskets/sealants. Avoid overdriving fasteners that restrict movement.
Water Infiltration
- • Issue: Improper sealing or flashing can lead to water infiltration behind the cladding, causing leaks, staining or damage.
- • Solution: Use proper sealants and gaskets between panels and at all penetrations. Ensure proper flashing details at windows, doors, and other openings.
Fastener Issues
- • Issue: Overdriven or underdriven fasteners can cause panel distortion or inadequate attachment. Incorrect fastener type can lead to corrosion.
- • Solution: Follow fastener schedules and drive depths per manufacturer. Use compatible fasteners (stainless steel or aluminum) to prevent galvanic corrosion.
Bowing/Warping
- • Issue: Panels can bow or warp due to improper storage, handling or installation techniques.
- • Solution: Store and handle panels properly to avoid damage. Use proper shims/spacers and don't overdrive fasteners which restricts natural movement.
Flatness/Alignment
- • Issue: Uneven substrates or improper panel installation can lead to waviness or misalignment in the cladding system.
- • Solution: Ensure substrates are flat/plumb within tolerances. Use spacers/shims and follow laying patterns to maintain flatness and alignment.
Color Variations
- • Issue: Differing dye lots or orientations of panels can create visible color variations.
- • Solution: Install panels from the same dye lots in the proper orientation. Mix panel bundles during installation.
Accessories
- • Issue: Improper flashing, trim or accessory integration can compromise weathertightness and aesthetics.
- • Solution: Carefully plan and integrate accessories following manufacturer instructions for proper fit and sealing.
Maintenance and Care
Cleaning
- • Regular Cleaning: Aluminium cladding systems should be cleaned regularly (at least annually) to maintain its appearance and prevent buildup of dirt, grime, or environmental contaminants.
- • Mild Detergent: Use a mild detergent or soap solution with a soft cloth or brush to gently clean the panels. Avoid abrasive cleaners or scrubbing pads that can scratch the finish.
- • Rinse Thoroughly: After cleaning, thoroughly rinse the panels with clean water to remove any soap residue, which can cause streaking or spotting.
Stain Removal
- • Graffiti/Tough Stains: For graffiti or tough stains, use a solvent-based cleaner specifically designed for aluminum cladding. Test in an inconspicuous area first and follow the manufacturer's instructions.
- • Avoid Harsh Chemicals: Avoid using harsh chemicals, such as acids, alkalis, or solvents not specifically recommended for aluminum, as they can damage the finish or cause discoloration.
Sealant Maintenance
- • Inspect Sealants: Regularly inspect the sealants and gaskets used between panels and around openings for any cracking, deterioration, or gaps that could allow water infiltration.
- • Reapply Sealants: If sealants are failing, carefully remove the old sealant and reapply a high-quality, compatible sealant according to manufacturer's recommendations.
Fastener Maintenance
- • Check Fasteners: Periodically check the condition of the fasteners securing the panels to the substrate, looking for any signs of corrosion or loosening.
- • Retighten/Replace: If fasteners are loose or corroded, retighten or replace them with compatible fasteners recommended by the manufacturer.
Drainage
- • Clear Drainage: Ensure that any drainage channels or weep holes in the Aluminium cladding systems are clear of debris to allow proper water drainage and ventilation behind the panels.
Touch-up Paint
- • Minor Scratches: For minor scratches or blemishes on painted aluminum cladding, use a touch-up paint matched to the panel color, following the manufacturer's instructions.
Professional Inspection
- • Annual Inspection: Consider having a professional cladding contractor or the manufacturer's representative perform an annual inspection to identify any potential issues and provide recommendations for maintenance or repairs.
- • Proper maintenance and care can help extend the lifespan and maintain the aesthetic appeal of aluminum cladding panels for many years.
Conclusion
Installing aluminium cladding requires meticulous planning and execution. This comprehensive guide provides step-by-step instructions to achieve a flawless installation, from surface preparation to panel alignment and finishing touches. Remember to address potential issues like thermal expansion, water infiltration, and fastener problems promptly. Regular aluminium cladding maintenance, including cleaning, sealant inspections, and fastener checks, is crucial for longevity. With proper installation techniques and routine care, aluminium cladding offers a sleek, durable exterior that enhances a property's aesthetic appeal and value for years to come. Follow this guide diligently, and you'll be rewarded with a stunning, long-lasting aluminum cladding installation.
For those interested in exploring the advantages of using aluminium cladding in modern architectural designs, our blog post titled The Benefits of Aluminium Cladding for Modern Architecture provides an in-depth discussion on this topic.